Enjoy These Yummy, Healthy Christmas Desserts (In View Of World Diabetes Day!)
 Contributed by
Ujjwala Baxi
November 24, 2016

Desserts are very yummy, and often very hard to resist – or let go of. But being able to have your cake, eat it, and feel guilt-free and healthy about it – well, that’s the challenge!
During the holidays especially, desserts and sweets are part of the festivities. After all, tis the season – good times come with good food, which includes delectable desserts!
But in this day and age, when many health problems, most particularly diabetes, are becoming more and more prevalent, it is important to choose what you eat, and be mindful of excessive sugar intake.
We’re sharing some amazing healthy Christmas desserts that let you enjoy, indulge, and still take care of your health.
In case you missed World Diabetes Day, celebrated in November, here is a video of registered dietician and diabetes educator Ms. Ujjwala Baxi, watch the video here. You can find the recipes for both the Nicecream and Banana Walnut Cake below.
Nicecream Recipe
What You’ll Need:
- Bananas – 4
- Peanut Butter – 2 tablespoons
(If you are allergic to peanut butter, replace it with almond butter or cashew butter instead) - Vanilla Essence – 1 no. (optional)
- Toppings of your choice
Instructions:
1. Peel the bananas and slice them into big chunks. Put them in to a zip lock bag and freeze them for 4 hours.
2. After 4 hours, remove the frozen bananas from the bag and blend well with the Philips Handblender until rich and creamy. This may take 5 mins approximately.
3. Add in the peanut butter and vanilla essence, and blend for another couple of minutes to mix well.
4. Empty the blended thick banana paste in a favourable container and set to freeze for another 2 – 3 hours to allow it to solidify like an ice cream. You may want to store it until you want to consume it.
5. Scoop out the ice cream, and voila! It’s ready to be dived into!
6. Top it up with toppings of your choice!
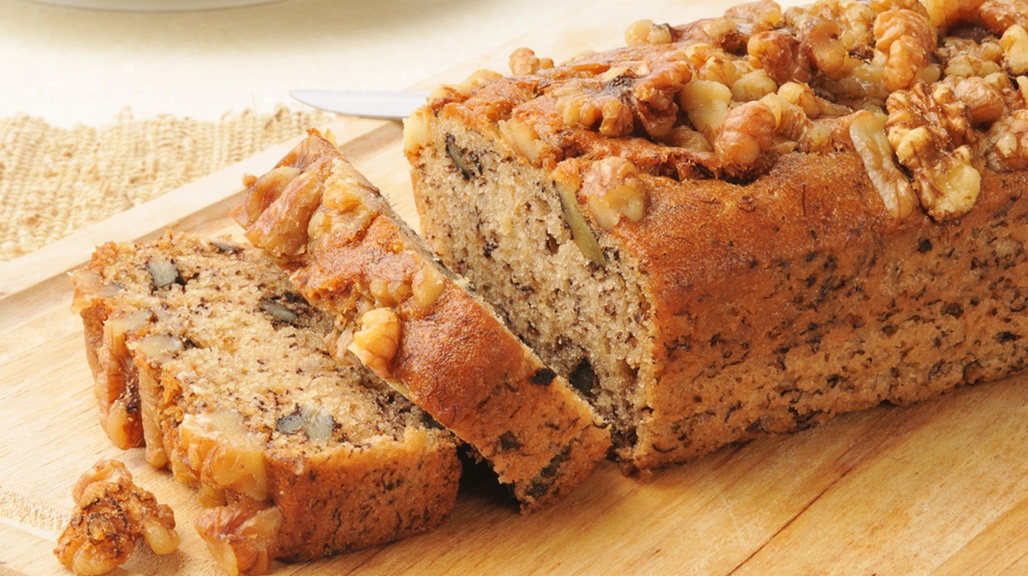
Banana Walnut Cake Recipe
Dry Ingredients:
- All-Purpose Flour – 1 cup
- Baking Powder – 1 tsp
- Baking Soda – 1/2 tsp
- Cinnamon Powder – 1/4 tsp
- Salt – a generous pinch
- Walnuts – 1/4 cup (roughly chopped)
Wet Ingredients :
- Brown sugar – 3/4 cup
- Thick Yogurt – 1/4 cup (at room temperature)
- Olive Oil – 1/4 cup
- Bananas – 2 medium sized (overripped)
- Vanilla Essence – 1 tsp (optional )
Method :
1. Grease & flour the baking tin. If you want, line with parchment paper/Butter paper.
2. Blend the bananas coarsely in Philips blender and keep aside.
3. In a bowl, mix oil,sugar, yogurt and vanilla essence (optional).
4. Mix in a teaspoon of flour with the walnuts and coat well. This will prevent sinking of walnuts in the cake batter. Add these flour coated walnuts in to the banana batter.
5. Sieve the dry ingredients together at least 3 times – this allows more aeration in the flour, and helps in making the cake light.
6. Fold in the dry ingredients and mix in the banana batter. Follow the rule of 1/3rd, and cut and fold procedure as shown in the video to allow better mixing and prevent the formed aeration from escaping.
7. Once the ingredients are all mixed well, pour the batter in the baking tin. Be sure to follow the last crucial step of tapping the tin 2-3 times – and then put it for baking in the air fryer.
8. It takes 30 – 35 mins at 160 degree celcius in Philips AirFryer for the cake to bake well. Preheating of the air fryer is not needed, so you do save sometime there.
9. When ready, remove it from the AirFryer and let it rest for 2 minutes in the tin before you cool it on a cooling rack.
10. Once completely cooled, cut into slices. These can be stored in an air tight container for 3-4 days. You can also enjoy it warm with a cup of tea or coffee.
Do share your photos with us if you try it out!
Happy indulging!
—
We are the leaders, activists, innovators, and visionaries – whether in the public eye or behind the scenes – who are revolutionising the way people think and live. We are #ConnectedWomen.


Sorry, the comment form is closed at this time.