Registering As A Freelancer In The Philippines
 Contributed by
Donna Donor
June 29, 2018

One of the things that we cannot avoid in our life is….TAX. As a freelancer, this is true and can be confusing.
Every time we purchase something, we pay tax. Our income is also taxed. When we die, our estate is also taxed. We really cannot escape tax.
Taxes were existent even in Bible times. Taxes collected are used by the government to improve the facilities and services in the country, like free education, free hospitalization, good roads, lower prices of commodities, among others. The bigger the tax collection is, the government has more funds to provide better services to the people.
Be Good Citizens By Paying Taxes
On the other hand, taxes were also used by corrupt officials to make themselves rich. This makes the people lose their faith in the government and for them not to pay taxes accordingly. But let us not make this as a reason not to fulfill our duties as a citizen of our country. There is a corresponding punishment for not paying the right amount of taxes, so let’s all be good citizens by paying taxes!
Benefits Of Paying Taxes
My boss at events management has been encouraging all of us to be registered because it is also for our own good. Paying taxes has benefits; it can be used as proof of financial capacity when we apply for loans and travel visa. Since I have plans to travel the world, I need to show proof that I am paying taxes to establish ties to my own country.
Honestly, I really don’t know where to start. I do not want to register as a business entity because the fees for registration is very high (it may reach up to Php20,000 depending on the location of your business and other fees) and the procedure is very tedious. I just recently found out that I can register as a self-employed/professional instead. I do not need to secure business permit and DTI registration for that.
The Process Of Registering As Self-Employed/Professional
So there, I am more determined to process being registered because there is a quick and easy way to do so.

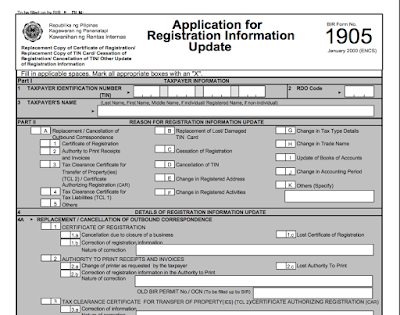
1. The first thing I did was to transfer from one RDO (Regional District Office) to another because I was previously employed. I filled up two copies of BIR Form No. 1905 for this and just ticked out the reason that I’m transferring RDOs. This procedure only took five minutes. I just have to wait three to five days for the transfer to take effect before I continue with the processing of my registration. My records should appear first in the RDO that I am transferring at before I can proceed with the registration process.

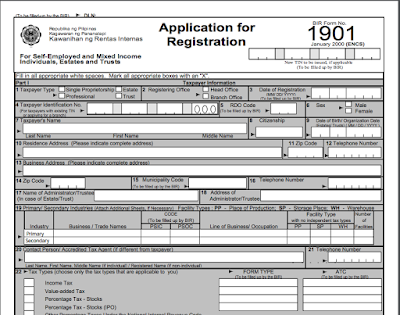
2. While waiting, I already filled out two copies of BIR Form No. 1901 and attached copy of my birth certificate, proof of income as a freelancer/self-employed (I attached an email copy of a blogging gig and a screenshot of my blog), birth certificate of my dependent (my son), Barangay Clearance, and Occupational Tax Receipt which you will secure at the municipal hall or city hall of your residence. I also had the Income Payee’s Sworn Declaration of Gross Receipt/Sales notarized (you can download all forms here). I filled up the one for those earning Php3,000,000. There is another one for Php250,000 but I was advised that should my income exceed Php250,000 I need to make amendments on my registration and will repeat the procedure all over again. Ideally, the Php3,000,000 gross receipts bracket is ideal for those who are receiving income from multiple payors and the Php250,000 income bracket is for those who are receiving income from lone payor.


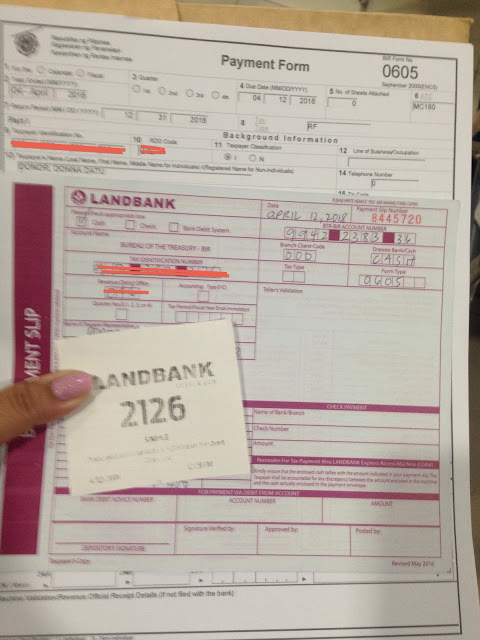
3. The BIR assessor then asked me to pay Php500 registration fee at Landbank using the BIR Form 0605 (Payment Form). After paying, I went back to BIR to have my payment acknowledged.
When the BIR assessor checked my documents, I was asked if I will apply for the 8% optional tax. This means that I do not need to pay 3% withholding tax and will just pay for the income tax. I weighed my options first and asked people which one will beneficial for me. I also read Taxumo’s blog to help me assess. The blog also has a tax calculator to help you decide which tax bracket will be more beneficial for you. It really depends on your income and expenditure on which option you will save more money.
I decided to apply the 8% optional tax.
I was asked to write a letter for my intention to file for the 8% optional tax and attach it on my application.
I was asked to go back later in the day to get my Certificate of Registration, wee!
The Certificate of Registration indicates the kind of tax/es that you will pay, the forms that you have to file/fill out, and the deadline for each filing.
However, since the 3% percentage tax is standard, I reminded the assessor that I applied for the 8% optional tax. The assessor made some amendments on my Certificate of Registration and put his initial beside it.

4. After securing the Certificate of Registration, you need to have your accounting books and ledgers stamped by BIR. You need four accounting journals (Cash Receipt Journal, Cash Disbursement Journal, General Journal, General Ledger). You can either buy these accounting books outside or buy at BIR (I am not sure how much are these if you bought it at BIR). You need to fill out BIR Form No. 1905 for this and attach a photocopy of your COR.

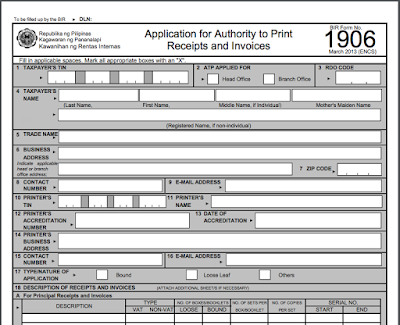
5. Last step is to secure Authority to Print (ATP). This is for printing receipts. Fill out BIR Form No. 1906 for this. Write on the form what kind of receipt you needed. For self-employed, you only need Official Receipts. I paid Php1,200 for ten booklets.
Everything can be done in a day, but if you do not have the luxury of time, you can go back the next day or so to finish everything. You can also hire services of a liaison officer to do the logistics if you have other things to do.
BUT…I can give you tips to make your life easier on registering as self-employed!
Tips On Registering For Self-Employment
–If you were previously employed, immediately check the RDO where your records are. Your application for the Certificate of Registration on the new RDO will not be processed until the transfer takes effect. Download BIR Form No. 1905 and fill out the necessary details in two sets. If the old RDO is too far from your place, just ask someone to do it on your behalf. This task is a no-brainer, just remind the person whom you’re going to hire for this task is to tell that you’re going to register as self-employed that is why you need to transfer RDOs.
–Bring all the requirements needed before you go to BIR (birth certificate, dependent’s birth certificate, Barangay Clearance, Occupational Tax Receipt, proof of income/contract depending on the nature of your work, sworn statement) to save time. Secure BIR Form No. 0605 (Payment Form) in two sets and actually you can already pay the registration fee of Php500 ahead of time by going to any Landbank branches before going to BIR. Make sure you photocopy the payment slip and the payment form. The photocopies will also be attached to your application form. You can already buy two documentary stamps in advance too. BIR has a counter there where you can purchase it. I paid Php30 for that.
–While BIR can assist you in printing your Official Receipts, you can still opt to have your own printer especially if BIR is too far from your place. Just fill out BIR Form No. 1906 properly to get the Authority to Print. In my case, I just let BIR do the printing because I’m just five minutes away from the office.
–Go early. People usually flock after lunch and processing gets slower in the afternoon. If you’re early, you can really finish everything in a day!
–Attend the seminar at BIR so that you will know how to file taxes. In my RDO, the seminar is every last Friday of the month. I will attend the seminar for this month.
–If you think your time is precious, you can actually hire a bookkeeper to do the dirty job for you. But I do encourage you to know the process so that you will know what to do in the future.
Are you now ready to be registered?
Interested in meeting Donna and other work from home experts like her? Join the Connected Women community now!


Sorry, the comment form is closed at this time.